
If you sell apparel online, you know the pain:
On-model images usually convert better than flat lays, but every launch requires models, styling, shoots, retouching, and coordination. By the time assets are ready, your campaign timing is already slipping.
You may have tried generating try-on images with a single prompt, only to see the same issues again and again: fabric texture changes, edges look dirty, the model style drifts, and you end up doing manual fixes anyway.
The real need is not one surprisingly good image.
The real need is repeatable production capacity.
A more production-friendly approach is to split virtual try-on into controllable steps: make the product compositable first, write an executable photography brief, then do the final composition. Once the recipe is fixed, scaling to new SKUs is mostly swapping inputs, and results become far more predictable.
Quick answer (30-second version)
If you want try-on images to stop feeling like gacha, the fix is not a longer prompt—it is separating variables into a 3-stage workflow:
- Stage 1 — Product standardization: make the product clean and compositable (crisp edges, no background residue), and lock “do not change structure / texture / logos”.
- Stage 2 — Photography brief: turn vibe words into executable constraints (framing, camera, light, background, whitespace, prohibitions).
- Stage 3 — Final composition: choose your priority (fidelity-first vs style-first). If results drift, rerun only the stage that failed.
Scope: as of 2026-01, this article focuses on “one product image → one commercial-grade on-model image” and how to make the process reusable.
What can you get from one product image? (Result first)
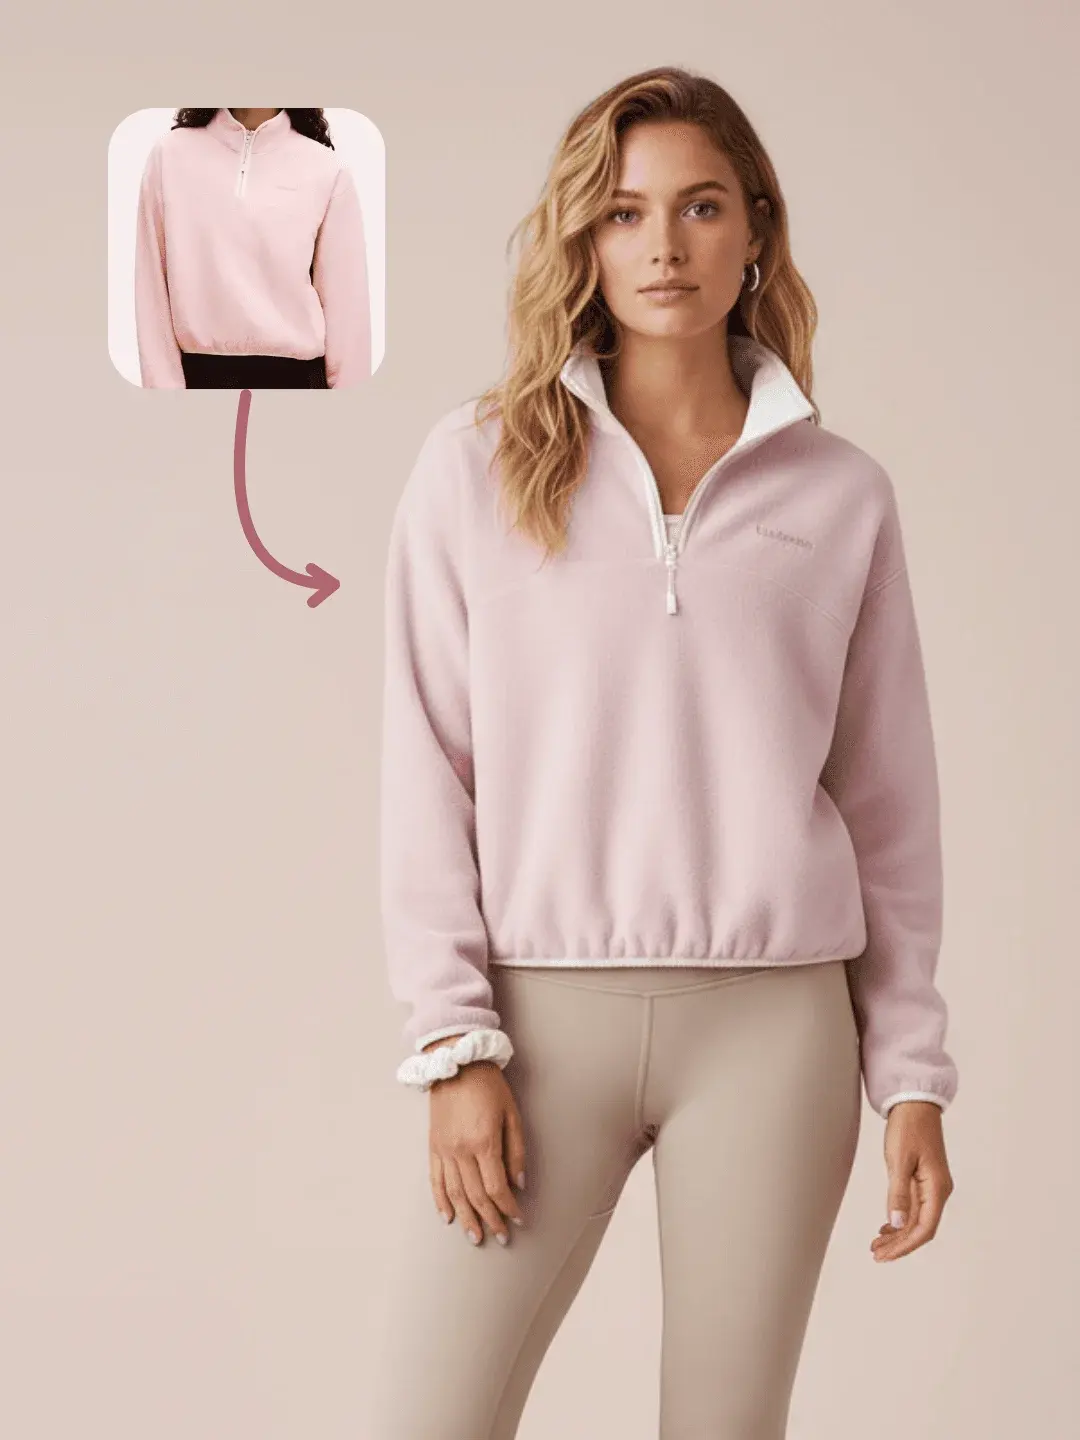
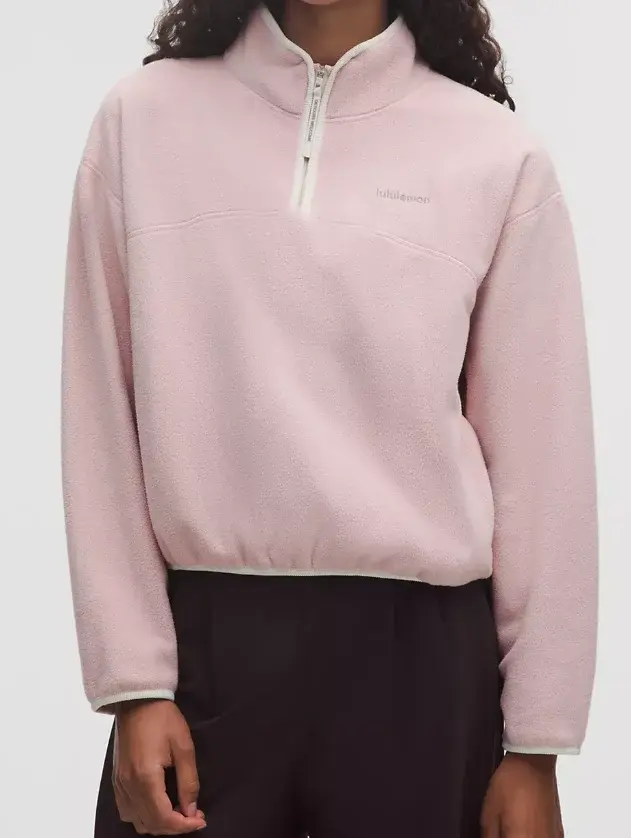
Input example: a clean product image with a simple background and clear details.
Output example: a clean on-model try-on image suitable for product pages and ads.

Why a single prompt is unstable (and feels like gacha)
The problem is not that models are weak. The problem is that too many unstable variables get mixed into one step: the product input may not be compositable (messy edges, background residue, unclear subject), your model and camera direction may be vague (abstract adjectives without constraints), and the process becomes non-reusable—one lucky result does not scale to the next SKU.
Workflows fix this by separating variables. You can standardize the product first, write a clear photography-style brief, and then do the final composition. Each step can be retried and improved independently.
A 30-second diagnosis: what is actually breaking?
Use these quick checks (each is visually verifiable) to locate the failure stage:
- Input isn’t clean enough: messy edges, background residue, low-detail texture to begin with.
- Fidelity constraints aren’t explicit: logos, zippers, pockets, collars get redrawn.
- Direction is too vague: premium/aesthetic without camera, framing, light, background, and whitespace constraints.
- Style and fidelity are mixed into one step: trying to get an editorial look while also preserving every garment detail in one shot usually conflicts.
The workflow breakdown below maps directly to these failure patterns.
What does this workflow actually solve? (Split try-on into 3 stages)
Think of it as three stages, each with one job: Stage 1 makes the product clean and reusable, Stage 2 turns your intent into an executable photography brief, and Stage 3 composes the product into a clean, commercial-looking try-on image. The point is not “more steps.” The point is controllability: when something goes wrong, you rerun one stage instead of restarting the whole process.
Stage 1: product standardization
This stage focuses on a single goal: isolate the product on a clean background with crisp edges.
It reduces common failures like jagged outlines, background ghosts, blurred details, and accidental logo edits.
If you want fast iteration, start with Nano Banana. If you need stricter edge cleanliness and detail preservation, switch to Banana Pro.
- Clean apparel product image
- Edge-clean, compositable product asset
- Preserve structure, texture, and logos
- Stabilize fidelity before style
Stage 2: write a real photography brief
Realistic try-on images depend less on fancy adjectives and more on clear, executable constraints: camera and framing (full body, camera height, breathing room), lighting and background (soft studio light, solid or subtle gradient background, clean shadows), model direction (pose, expression, vibe, accessories), and—most importantly—what must not change (garment structure, texture, logos, and no extra text).
The workflow first extracts a product description, then combines it with your model preferences to generate a complete scene description.
For this stage, GPT-4o works well for image description and brief generation. The goal is not “better writing.” The goal is to turn vague intent into constraints the next stage can execute.
- Product description + model preferences
- Executable scene and camera brief
- Make framing, lighting, and prohibitions explicit
- Clear constraints drive stable renders
Stage 3: final composition
The final step combines the standardized product and the generated brief into the try-on output.
At the final composition stage, you usually choose between two goals. For maximum product fidelity, use Nano Banana. For more fashion editorial cohesion, try Seedream 4.0.
- Standardized product + scene brief
- Commercial-grade try-on image
- Choose fidelity-first or style-first
- If unstable, adjust the previous stage
What should you input to get stable results in 3 minutes?
You only need two inputs: one clean product image, and one model preference prompt written like casting notes. Treat it like a brief a photographer can execute, not a vibe the model has to guess.
Use this input checklist before you run the workflow:
- Product image: simple background, crisp edges, clear texture, visible logos/details, minimal occlusion.
- Model preference: written like casting + camera direction (not just aesthetics).
- Prohibitions: explicitly include “do not change logos / texture / garment structure” and “no extra text”.
Example:
California vibe, blonde hair, athleisure, Gen Z; full-body shot; soft studio light; solid or subtle gradient background; garment must be sharp, realistic proportions; do not change logos or fabric texture; no extra text.
The more your text reads like a brief a photographer can execute, the more stable the result.
Scope and boundaries (when not to force it)
This workflow is designed for repeatable production, but it has clear boundaries. If you hit these cases, fix the inputs or relax the goal first—otherwise you will keep reworking the same failure:
- The product input is already low quality: blurred edges, missing texture, heavy occlusion.
- Key structural details are not visible: zippers, pockets, collars, or logos are unclear—this increases the chance of redraw.
- You want “editorial look” and “perfect fidelity” at the same time without deciding tradeoffs: pick fidelity-first or style-first, then tune the previous stage accordingly.
When things go wrong, what should you adjust first? (Troubleshooting by stage)
Product shape or texture changes, logo changes
Go back to Stage 1 and standardize the product harder. Then add explicit constraints in the brief: do not change logos, do not change fabric texture, do not alter garment structure.
Model style drifts
Write the model direction like casting: age range, hair, makeup, vibe, pose, camera distance. Avoid abstract adjectives.
The image looks synthetic
Make the commercial constraints stricter: clean background, even soft light, clean shadows, full-body framing with spacing.
What should you do next to make it repeatable?
If you want to start from a ready-made process (then harden constraints for your category):
- Open the Virtual Try-on template
- Open the Batch Try-on template (multi-model / multi-style production)
FAQ
I only care about “looking real”. What should I change first?
Start with Stage 2 (the photography brief). Make camera, framing, light, background, and whitespace explicit. Realism becomes stable only after the “shoot direction” is stable.
I care most about product fidelity (logos/texture/structure). How do I protect it?
Treat fidelity as a hard constraint in Stage 1 + Stage 2: standardize the product harder, and explicitly prohibit changes to logos, fabric texture, and garment structure before you try to push style.
Why do you recommend rerunning only one stage when results are unstable?
Because it isolates variables. If you change product cleanup, brief, and composition at the same time, you cannot tell what fixed the issue—so you cannot reuse the recipe reliably.
Can AI virtual try-on images be used directly on product listing pages?
Yes, but two prerequisites must be met: product details (logo, texture, silhouette) must be accurate, and image quality must reach commercial photography standards. Build a minimum checklist: Is the logo intact? Has the texture been altered? Are proportions correct? Are edges clean?
What kind of product image works best as input?
Stable inputs meet three conditions: clear subject with minimal occlusion, stable angle (avoid extreme perspectives), and sufficient resolution (visible material details). White background images are usually most stable, but other backgrounds work as long as they're clean and the product is clear.


