
Why AI Influencer Generation Keeps Failing
If you've tried generating virtual influencer content with AI, you've probably run into the same pattern: the face changes every time (hair, eye color, face shape drift between runs), photos look obviously synthetic (plastic skin, incoherent lighting), and the moment you try to scale to 20 posts, the process collapses into manual tweaking where each attempt feels like a coin flip.
The root cause is not that prompts are too short. The root cause is that AI generation is inherently stochastic, while brand content requires controlled consistency. If the system does not have a stable identity anchor, it will keep re-inventing the person as it tries to satisfy the scene.
OpenCreator's solution is to turn character consistency into a workflow artifact: you first lock a character reference (both as images and as an explicit description), then you produce lifestyle content against that reference so the creative variables live in the scene, not in the identity.
Why Prompts Alone Can't Deliver Consistency
In traditional workflows, every time you input a prompt, the model re-interprets what the person looks like from scratch. Even if you write very detailed descriptions, the model's understanding will drift—this time the chin is round, next time it's sharp.
If you want to reduce randomness, the more reliable approach is to first generate a set of character reference images and treat them as a visual anchor. All subsequent content is generated against that anchor, so you are no longer re-explaining identity in every prompt. In practice, the workflow has three phases. First, you cast the character by writing down physical traits and generating a small set of candidates to choose from. Second, you turn the chosen candidate into a multi-angle reference sheet and a Character DNA document so the identity becomes explicit and reusable. Third, you produce scene content (photos and optionally video clips) by combining a scene brief with the identity reference, so variation comes from composition and environment instead of the face.
The core logic is to replace vague text descriptions with structured reference assets.
Workflow Overview
| Stage | Input | Output | Model |
|---|---|---|---|
| 1. Character Casting | Physical trait description | 3 candidate selfies (4K) | Gemini 3.0 Flash Image |
| 2. Reference Sheet | Selected candidate | 9-panel multi-angle sheet + DNA doc | Gemini 3.0 Flash Image Edit |
| 3. Scene Content | Scene description + reference | 6 lifestyle photos (2K) | Gemini 3.0 Flash Image Edit |
| 4. Video (Optional) | Photos + motion prompts | 6 clips of 5 seconds | Kling 2.6 Pro |
Solidifying This Method Into a Workflow
OpenCreator has solidified the above three stages into a reusable template. Just fill in the inputs, and the rest—prompt optimization, model calls, step-by-step generation—happens automatically.
Stage 1: Character Casting and Candidate Generation
First, fill in the character's basic traits (first Text Input node):
MODEL BRIEF:

Gender: Female
Ethnicity: White European
Age: 28
Persona Vibe: Confident energy
Body Type: Slim, athletic frame with defined shoulders
Skin Tone: Light olive skin with warm golden undertones
Eye Colour/Shape: Dark brown almond-shaped eyes
Hair Signature: Long raven black hair with natural waves
Defining Features: High-set cheekbones, narrow jawline, refined nose
The workflow automatically does several things: expands your brief description into detailed photography direction (iPhone selfie aesthetic, 9:16 portrait, visible skin texture), then generates 3 candidates with different vibes—approachable, high-intensity, soft-serene. Each candidate is a 4K portrait selfie.
You pick one of the three and proceed to the next step.
⚠️ Pick only one: If you select multiple candidates for the next stage, AI will confuse identities, resulting in inconsistent faces in the reference sheet.
Stage 2: Multi-Angle Character Reference Sheet
After selecting a candidate, the workflow uses that photo as a base to generate a 3x3 grid multi-angle reference sheet. Top row: front smiling with teeth visible, chin up, chin down; middle row: 3/4 left, left profile, 3/4 right; bottom row: full-body front, back view, full-body 3/4 angle.
All angles wear the same dark athletic compression wear, with a clean grey studio wall background. This design ensures body proportions and silhouette are clearly visible, not distracted by clothing and background. Resolution is 4K.
After getting the reference sheet, the workflow also calls AI to analyze these images and extract the Character DNA system—physical attributes (height, weight, skin tone, bone structure), style presentation (clothing, posture, expression), personality traits (emotional expression, behavioral patterns), voice and speech (accent, pitch, pacing), age and background.
This DNA document is the identity lock for all subsequent content generation.
Stage 3: Scene Content Production
Now you can drop the character into real scenarios. Fill in scene information (second Text Input node):
BASIC SCENE INPUTS:

Location: China Town, London City
Lighting: Bright sunny afternoon
Action: In the busy streets of china town sipping bubble tea
Outfit: Athleisure just finished at the gym with a crop puffa jacket
Intent/Vibe: Uncanny calm in hyper-urban chaos
The workflow acts as a lifestyle creative director, generating 6 shooting plans with different compositions based on your scene input and character DNA—mid-shot portrait, extreme close-up POV, wide-angle looking away, front-camera selfie, motion blur, ultra-wide environmental portrait. Then, using the character reference sheet as a base, it generates 6 photos according to each plan (9:16 portrait, 2K resolution).
Deliberately Designed Imperfection
This workflow doesn't pursue the plastic-perfect aesthetic common in AI generation. Instead, it deliberately simulates the realism of handheld iPhone photography: skin shows visible pores and minor blemishes, camera has slight shake and focus drift, imperfect cropping (arms may be partially cut off), motion creates blur and exposure changes.
These details make the generated content look more like real-person photography, rather than AI production.
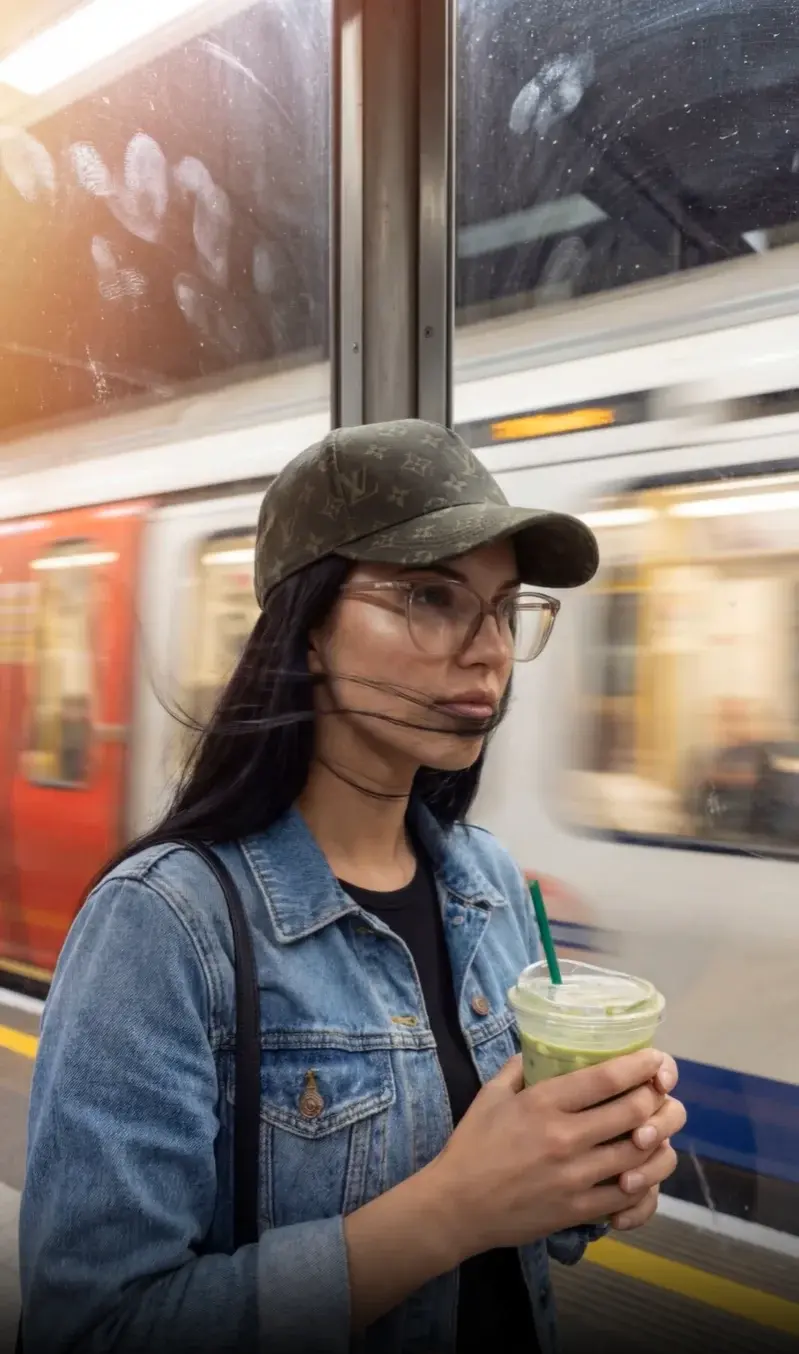
Here's an example of workflow output—a lifestyle short video in an urban setting:
Example output: AI influencer lifestyle content with authentic street vibes
Optional: Convert to Video
If you need to convert static photos to video, the workflow analyzes each photo and generates corresponding motion prompts—character's micro-movements, breathing, blinking, clothing sway, camera shake, etc. Then it uses the Kling 2.6 Pro model to convert each photo into a 5-second video (9:16 portrait).
Video example: Natural motion generated from static photos
When Is This Method Worth Using
If a brand needs a stable virtual spokesperson who maintains identity consistency across different scenarios, this method saves a lot of hassle. It's also suitable when social media content teams need to batch-produce style-consistent photos/videos. E-commerce brands wanting to use virtual models to showcase products while keeping the model the same person across different SKUs can first generate a reference sheet, then reuse it later.
But there are also unsuitable situations. If you need extremely realistic human close-ups (like printing into large posters), AI still has detail issues at very high resolutions. When characters need to perform complex actions or hand close-ups, AI tends to fail. When characters need to interact with real people or appear in the same frame, AI-generated lighting and perspective may not align.
Cost and Efficiency
Cost of running the complete workflow typically breaks down by stage like this:
| Stage | Output | Typical cost (Credits) |
|---|---|---|
| Stage 1 | 3 character candidates | ~60–90 |
| Stage 2 | Reference sheet + DNA | ~40–60 |
| Stage 3 | 6 scene photos | ~120–180 |
| Optional | 6 clips (5s each) | ~600–900 |
If budget is limited, you can run only Stage 1 and Stage 2 to get a reusable character reference sheet and DNA document. Subsequent scene content can be generated using other tools based on this reference sheet.
Three Tips to Improve Success Rate
Success rate improves when your inputs are written like casting and directing, not like compliments. For casting, specificity beats adjectives: instead of “beautiful woman,” describe the bone structure you can verify on an output (high cheekbones, narrow jaw, straight nose bridge). If you only write temperament words (gentle, confident, aloof), the model has too much freedom to re-invent the face between runs, which is exactly what you are trying to avoid.
For scenes, actions beat poses. “Standing on the street looking at camera” often produces stiff, staged images. “Walking down the street sipping bubble tea, occasionally glancing at camera” gives the model a sequence of micro-movements that reads as natural. This is also where the hyper-real feel comes from: weight shifts, relaxed expressions, and imperfect framing are the cues that make the result feel like a real person rather than a catalog render.
Finally, wardrobe should match real life. Editorial fashion descriptions often push the output into “too perfect” territory, which makes AI artifacts more obvious. Daily wearable styling (post-gym athleisure, oversized hoodie, practical layers) makes the result look more like social content than an ad, which is the entire point of this workflow.
When Things Become Unstable
When input character traits contradict each other (like baby fat + high cheekbones), AI will waver between two opposite directions. When scene descriptions are too complex (like riding a bicycle in the rain while talking on the phone), AI easily drops the ball, doing neither the action nor environment well. When clothing descriptions are too specific and include brand logos, AI may generate distorted logos or simply ignore them.
If results aren't ideal, try these directions: simplify character traits to 3-5 most critical descriptions (keep only skin tone, hair color, face shape). Break complex scenes into multiple simple scenes and generate separately. Use style direction instead of specific items (like use street casual instead of Nike hoodie + Adidas joggers).
Next Steps
Open this AI influencer creation workflow template, fill in your character description, and generate your first candidate.
Application Note: The workflow introduced in this article is based on the OpenCreator platform, using Gemini 3.0 Flash Image and Kling 2.6 Pro models. As of January 2026, this method is suitable for generating social-media-grade virtual influencer content (Instagram, TikTok, Xiaohongshu, etc.).
Frequently Asked Questions
Q: How long can the generated character maintain consistency?
As long as you keep the reference sheet and DNA document generated in Stage 2, you can theoretically reuse them indefinitely. Just upload the same reference sheet as a visual anchor every time you generate new content.
Q: Why deliberately make photos imperfect?
Overly perfect photos immediately reveal AI generation. Real phone photos have handheld shake, imperfect cropping, motion blur, etc. These flaws actually enhance realism.
Q: Can I use real person photos as input?
Technically yes, but you need to be mindful of portrait rights and privacy issues. If creating a virtual spokesperson for a brand, it's recommended to start from scratch with text descriptions to avoid legal risks.
Q: How to keep clothing style consistent across different scenes?
In the DNA document, clearly define Clothing Style (like minimalist athleisure). When generating scene content, reference this style definition in the Outfit field rather than describing specific items each time.


